Form builder overview
The GiveFlow form builder lets you create and customize donation forms using a full-screen block editor. You can add fields, configure layouts, and preview your form before publishing.
Accessing the form editor
Every form belongs to a campaign, so you reach the editor through the campaign it lives under.
- Open GiveFlow, then Campaigns, and click the campaign you want.
- Switch to the Forms tab.
- Click a form title to open it in the editor.
The Forms tab is also where you create a form. Click Add new form, pick a template, and GiveFlow opens the new form in the editor.
Editor layout
The form builder uses a full-screen editing interface with three main areas.
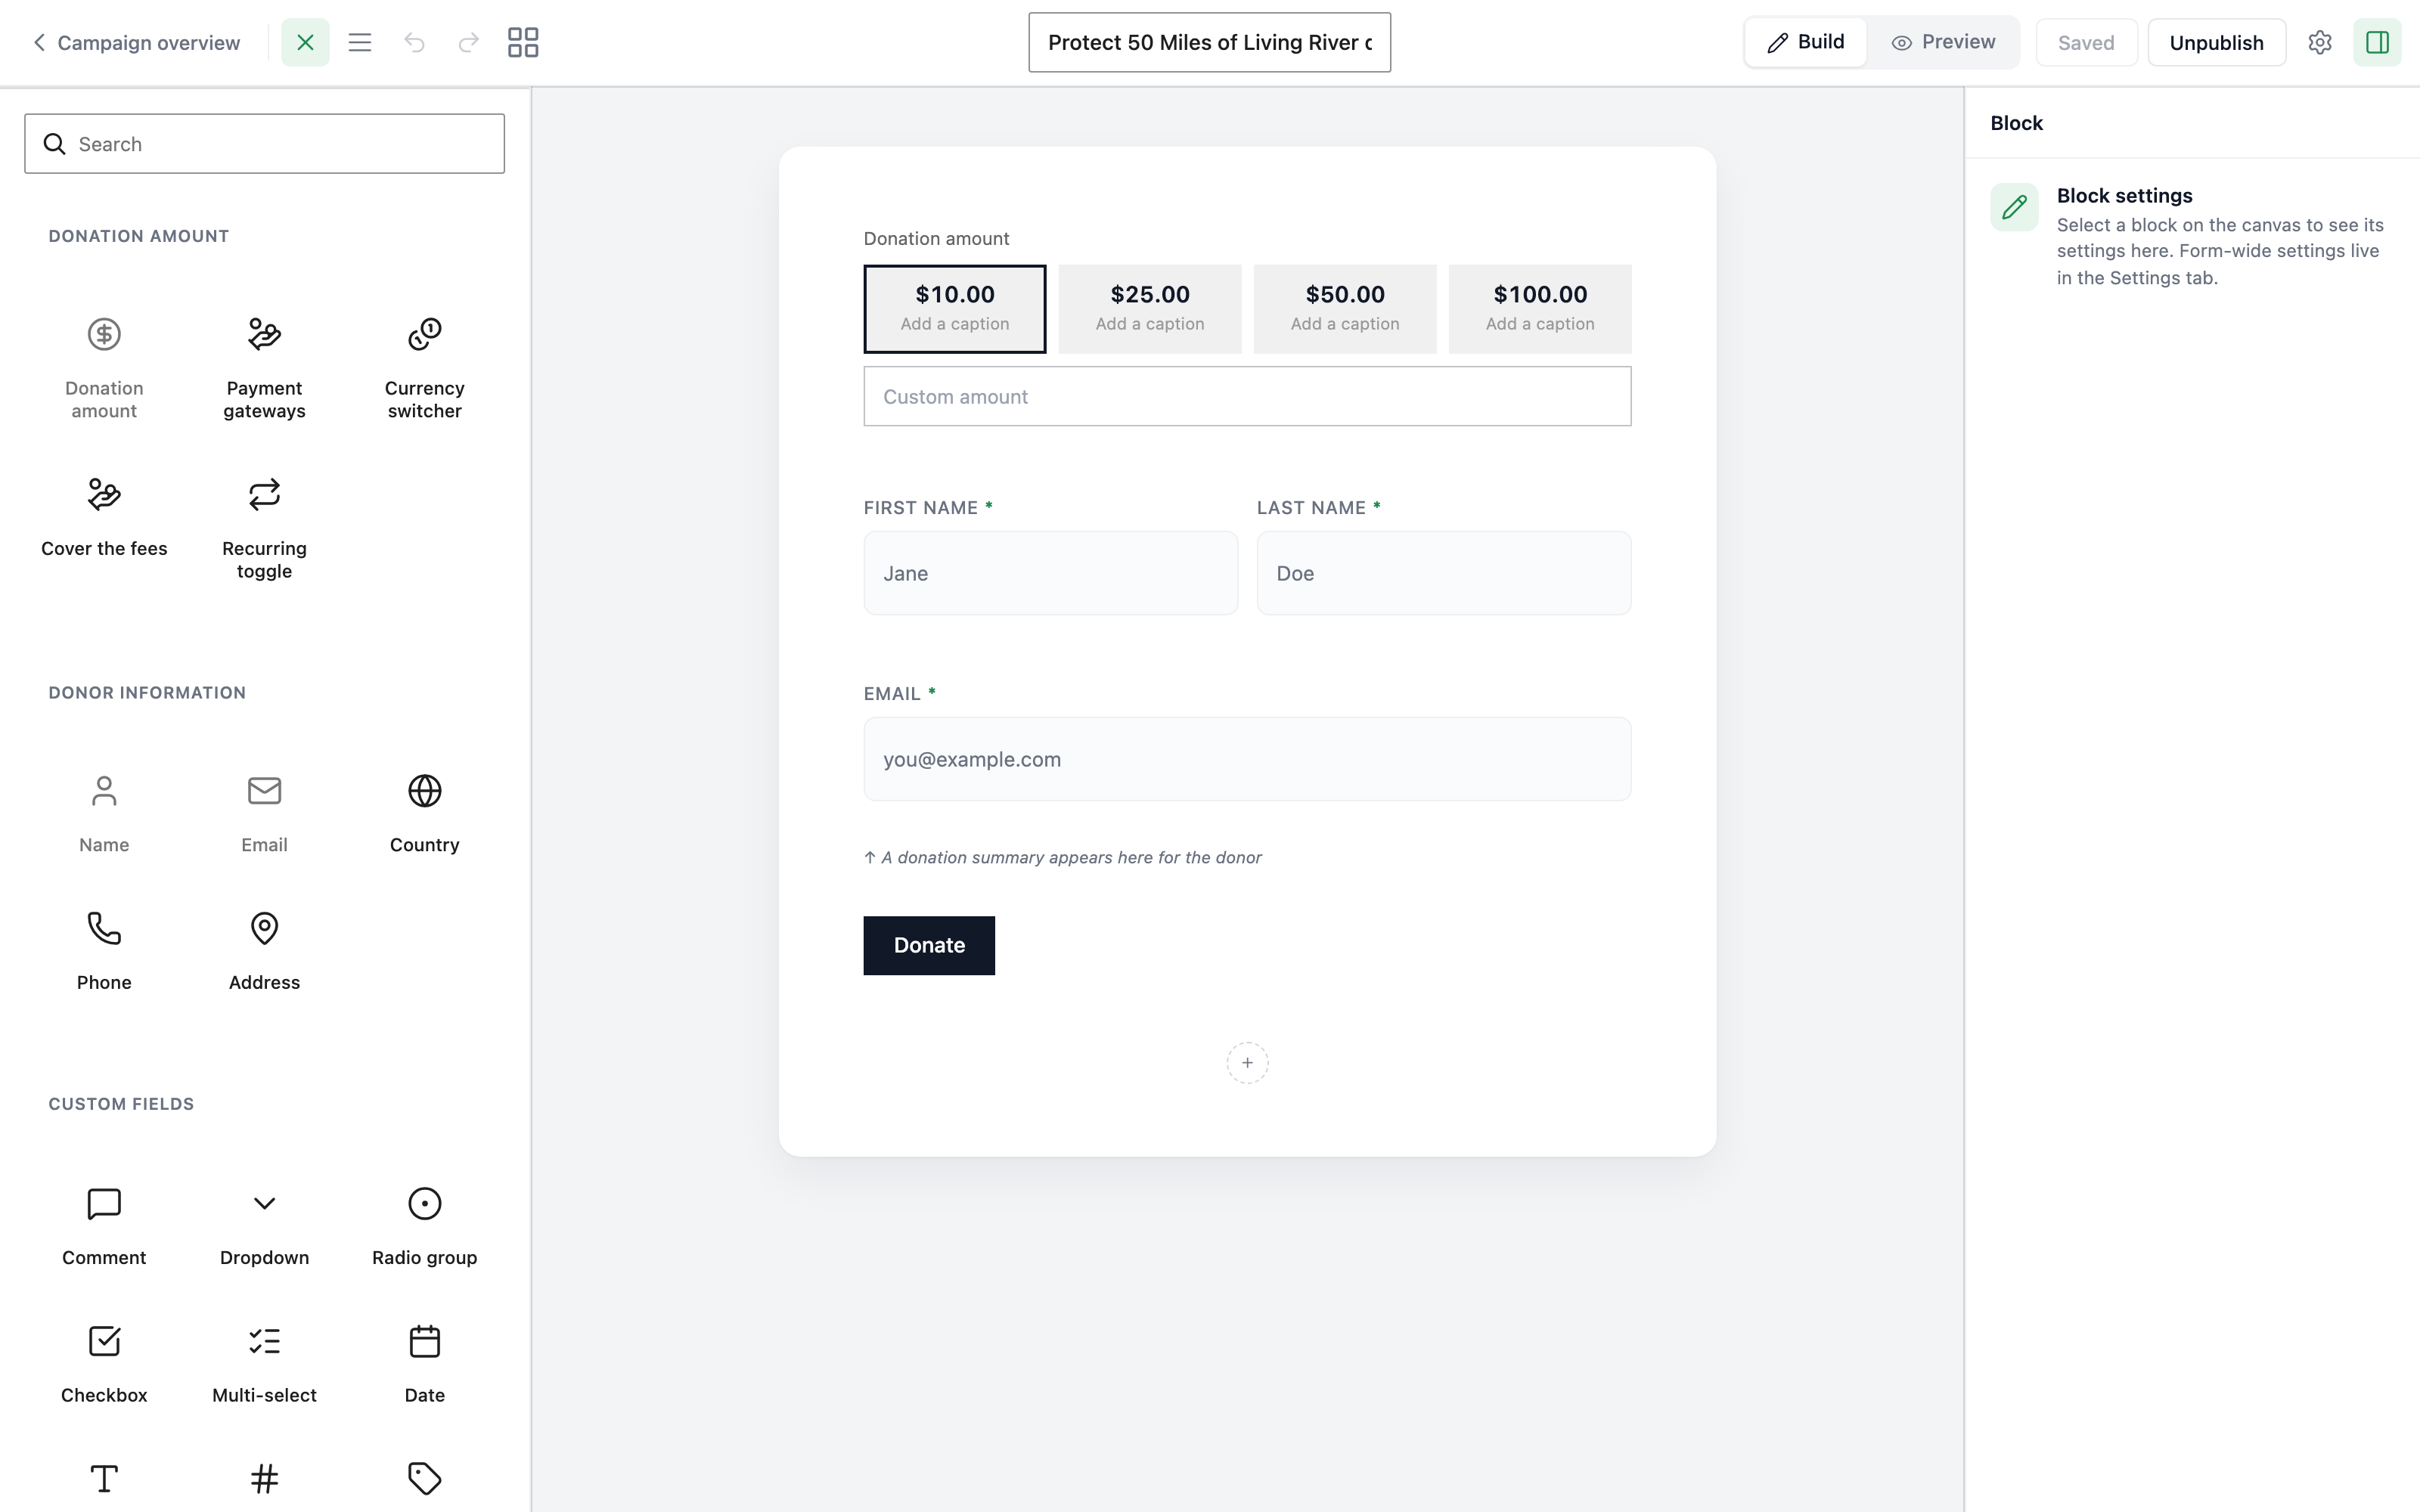
- Block inserter (left): Open it with the plus button in the header to browse and search blocks, organized into five categories: Donation amount, Donor information, Custom fields, Content & layout, and Extras. The button next to it swaps the panel for Form structure, an outline of the blocks already on the form.
- Canvas (center): Drag, drop, and arrange blocks to build your form. Click any block to select it.
- Inspector panel (right): Configure settings and attributes for the selected block. Toggle it with the side-panel button in the header.
The header also has Build and Preview tabs. Preview renders the real form so you can see how it looks to donors before you publish, and you can switch between desktop, tablet, and phone widths.
Required blocks
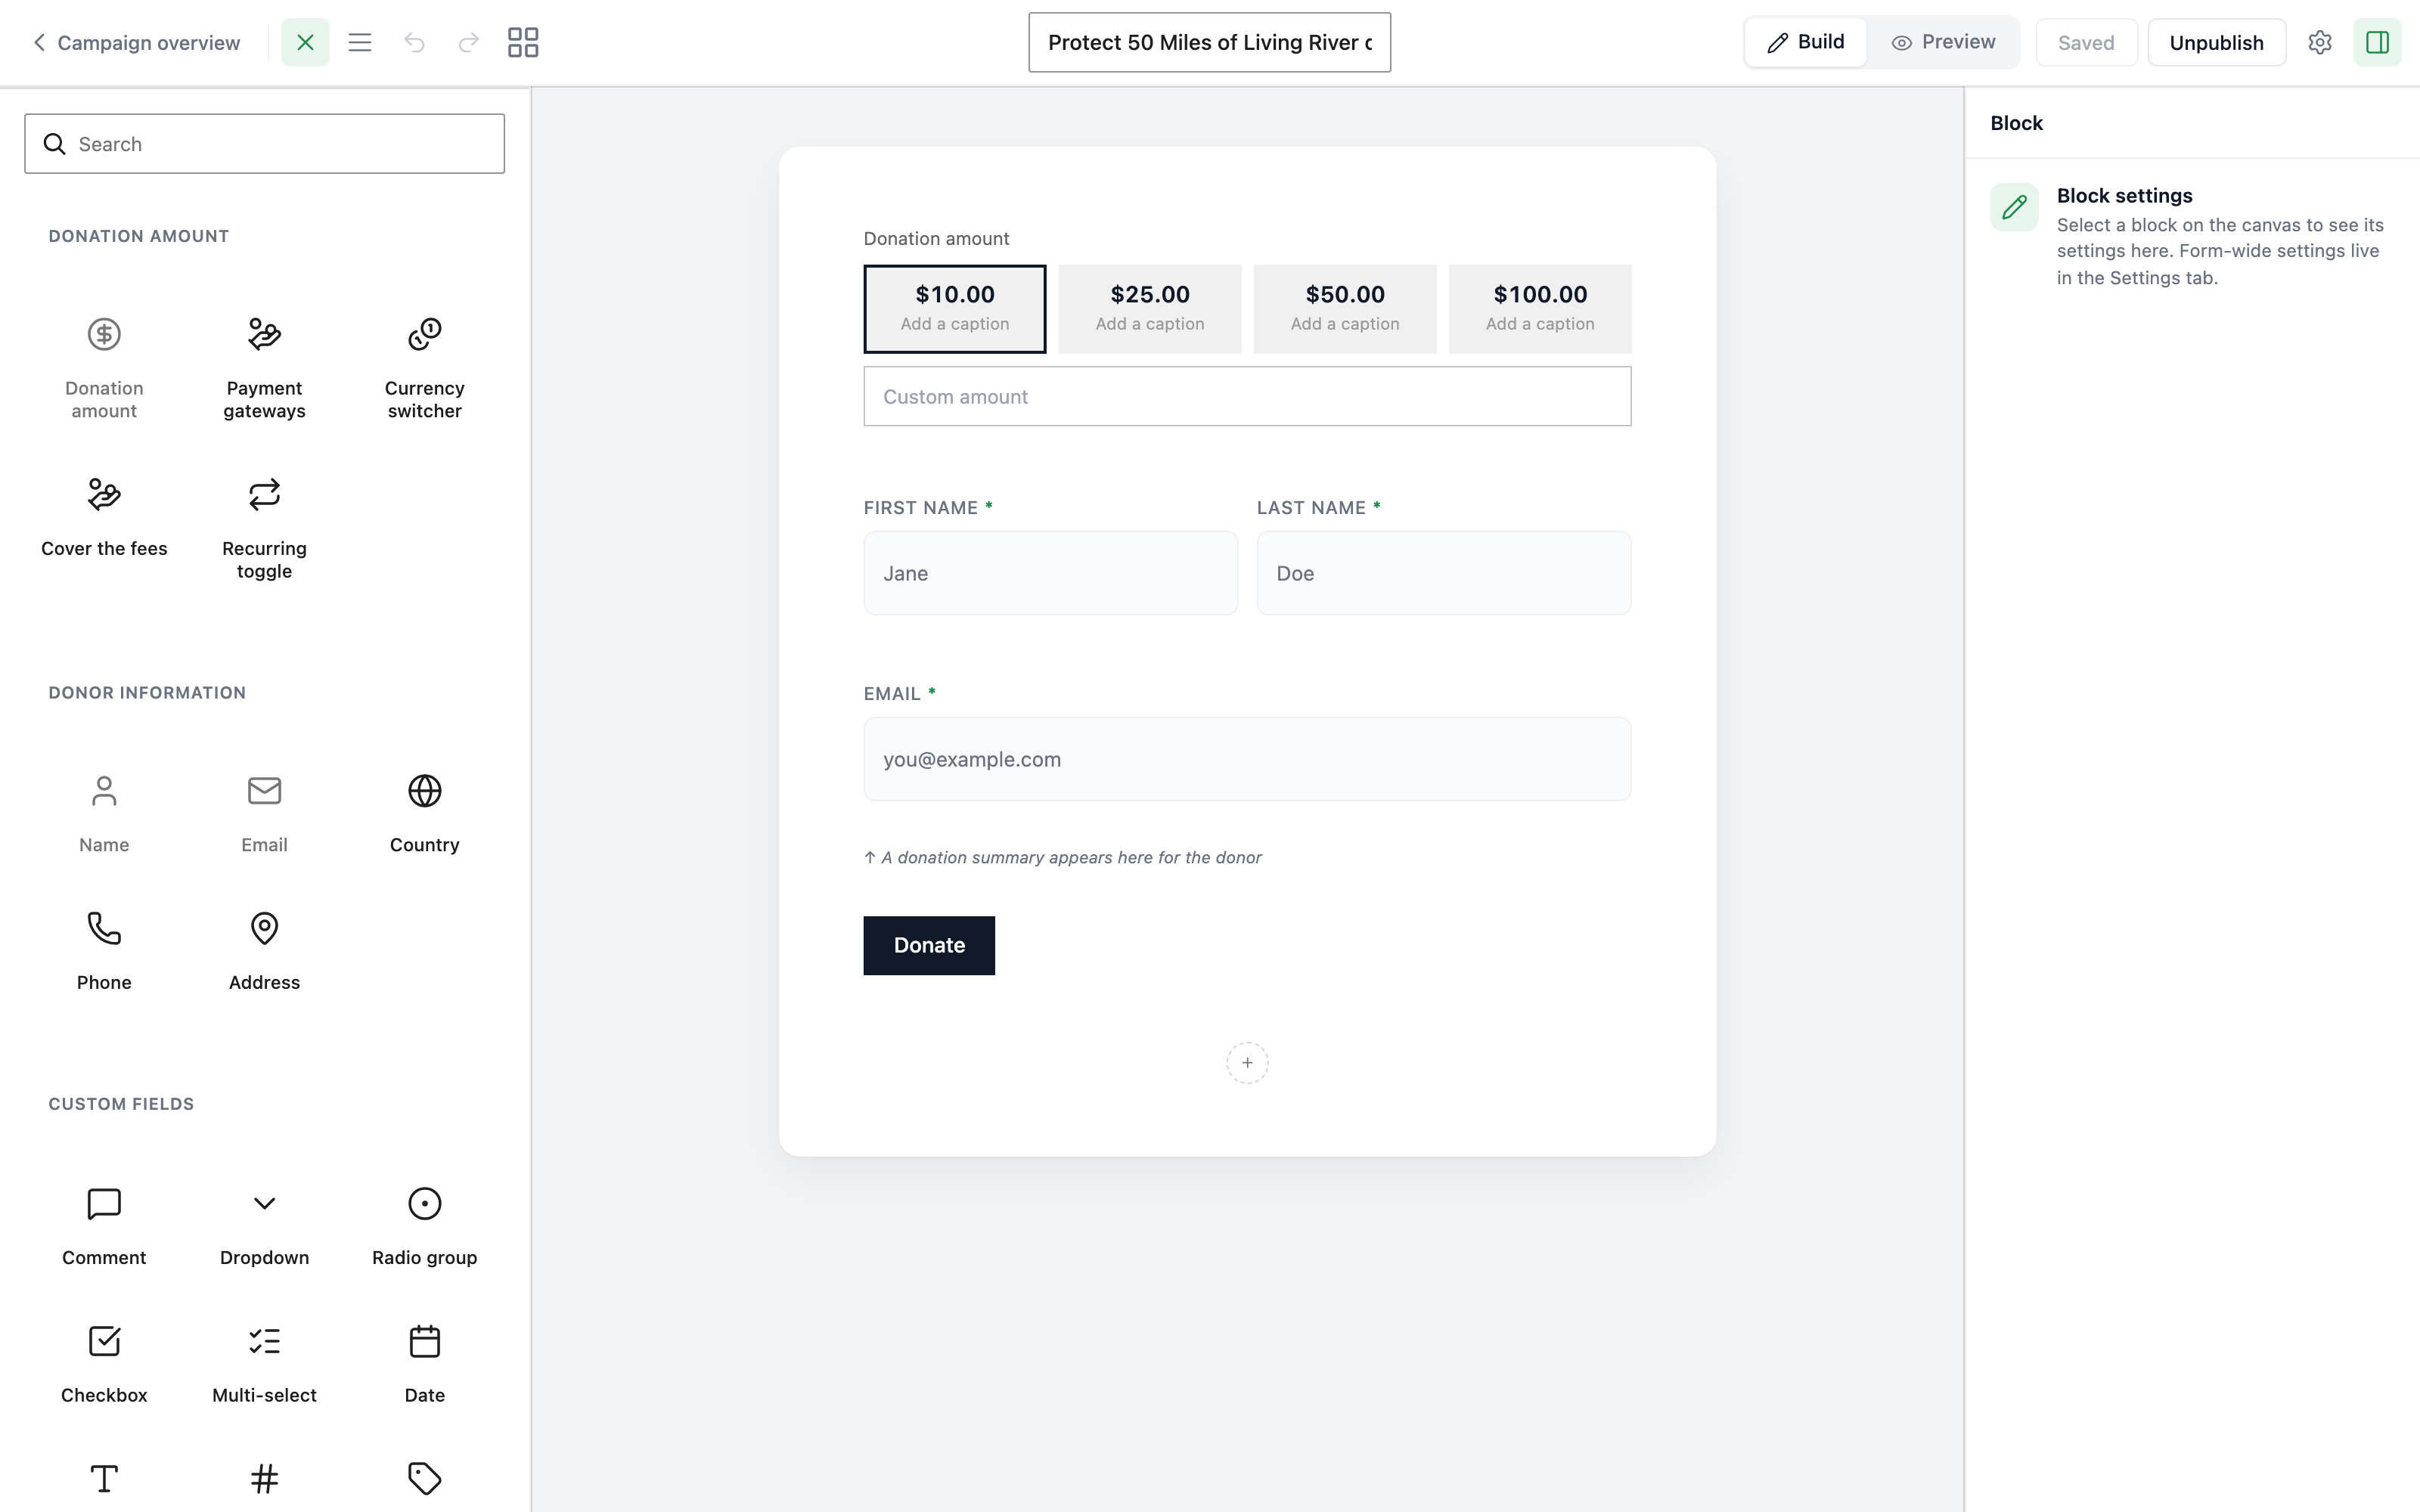
Every form must include three required blocks before you can publish:
- Donation amount — Lets donors choose how much to donate.
- Name — Collects the donor’s first and last name.
- Email — Collects the donor’s email address.
If any required block is missing, the editor shows a warning at the top naming the ones you still need. You cannot publish the form until all three are present.
Adding blocks
- Click the plus button in the header to open the block inserter.
- Browse the categories or search for a specific block by name.
- Click or drag a block to add it to the canvas.
The block appears on the canvas where you can reposition it as needed.
Removing blocks
- Select the block on the canvas.
- Open the options menu (the three dots) in the block toolbar.
- Choose the delete option.
Required blocks (Donation amount, Name, and Email) can be removed but must be re-added before you publish.
Reordering blocks
You can reorder blocks in two ways:
- Drag and drop: Click and hold a block, then drag it to a new position on the canvas.
- Block toolbar arrows: Select a block and use the up/down arrows in the toolbar to move it.
Form settings panel
The form settings panel controls form-wide options that apply to the entire form. These settings are separate from individual block settings.
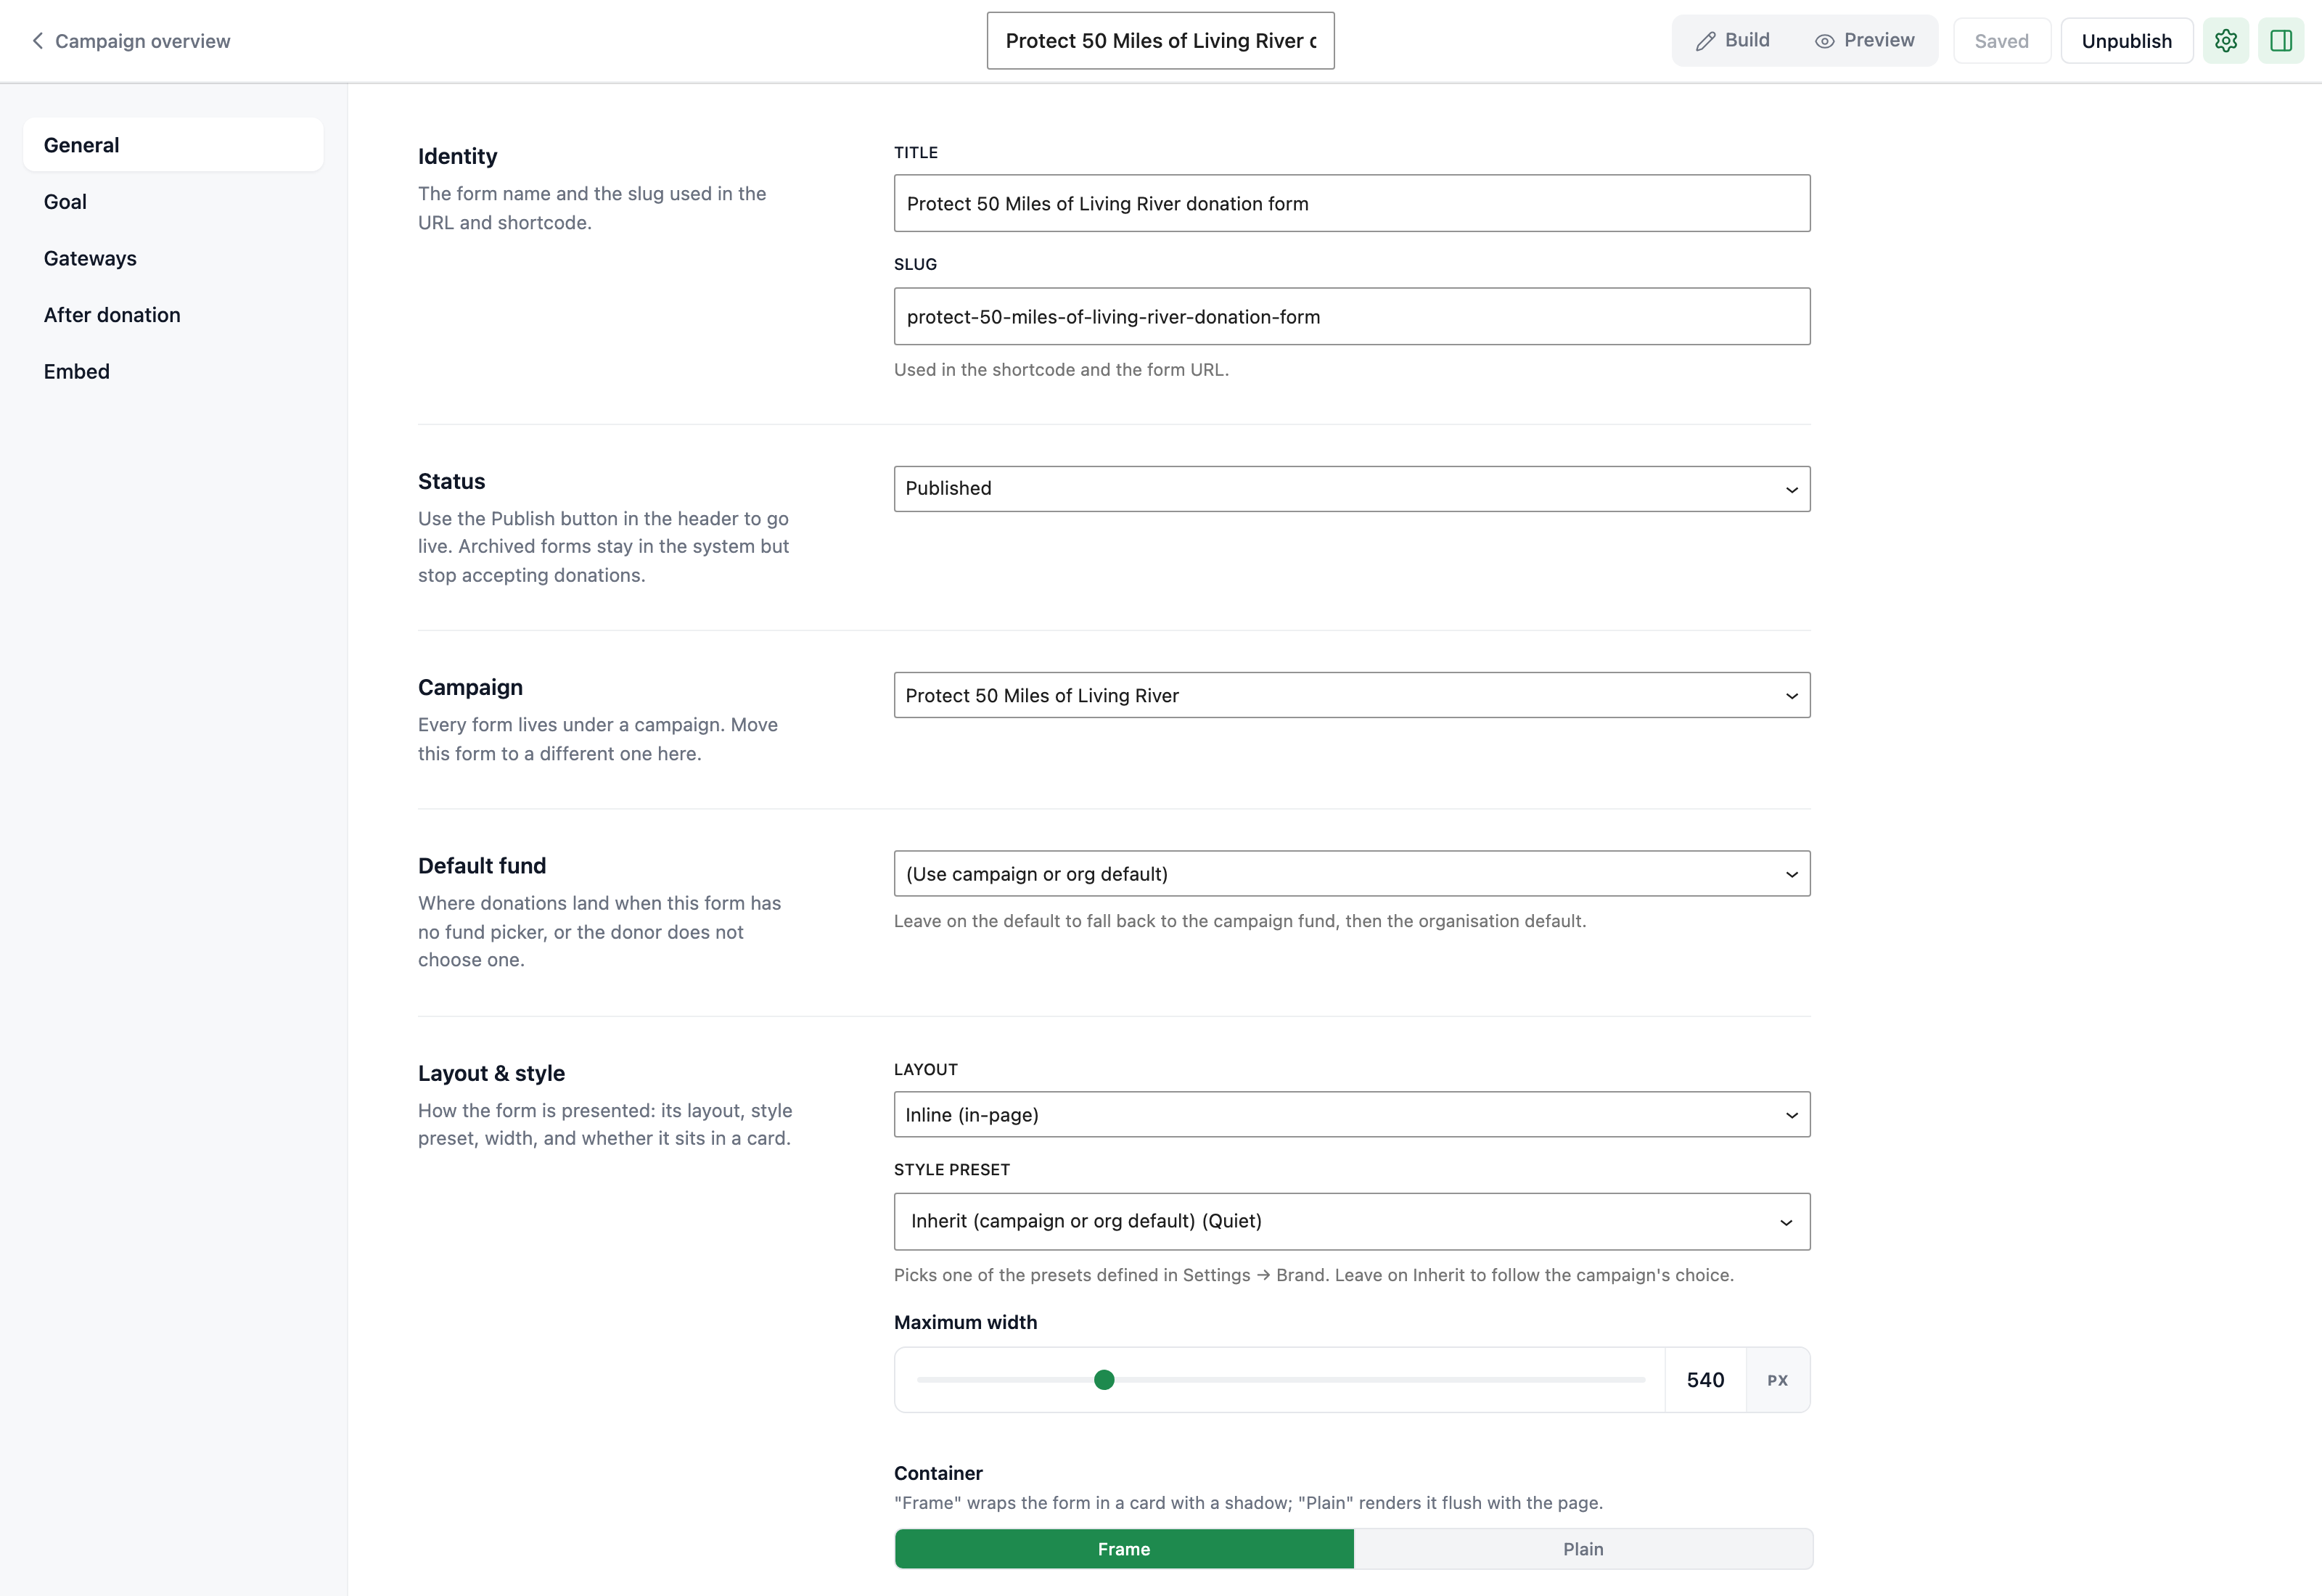
Open it with the settings button in the header, next to Publish. It replaces the canvas and is split into five tabs:
- General: Title and slug, status, the campaign the form belongs to, the default fund, and layout and style. Layout is inline or modal, the style preset is inherited from the campaign unless you pick one, and the container is frame or plain with a maximum width between 320px and 1200px.
- Goal: Set a goal for this form alone by amount, number of donations, number of donors, or no goal.
- Gateways: Restrict which payment gateways are offered on this form. The test mode toggle for the form lives here too.
- After donation: The thank-you message and an optional redirect URL.
- Embed: The shortcode you paste to place this form on a page.
For detailed information on each setting, see Form settings.
Publishing and publish readiness
Switch to the Preview tab and open the side panel to see Pre-launch checks. The list combines the required-block check with a set of server-side checks, and only shows the ones that need attention.
The server-side checks cover:
- A payment gateway is enabled for this form, and, if you use Stripe, the account can take charges. PayPal has no equivalent condition, because GiveFlow verifies its credentials when you save them, so a connected PayPal account counts as ready.
- The form is not left in test mode.
- Receipt emails have a sender address on your own domain.
- The donation receipt email template is enabled.
- The site is served over HTTPS.
- If the form offers recurring donations, an enabled gateway supports them.
- If the form has a recurring toggle, it offers at least two frequencies.
To publish:
- Add all required blocks: Donation amount, Name, and Email.
- Configure your form settings as needed.
- Click Publish in the top-right corner of the editor.
Missing required blocks are the only thing that blocks publishing. The Publish button stays disabled until all three are present, and a notice at the top of the editor names the ones you still need. The other checks are things to fix before donors can actually give; they do not stop you from publishing.