Managing donations
This guide covers how to view, filter, and manage donations in GiveFlow. You will learn how to navigate the donations list, understand statuses, process refunds, and more.
Donations list
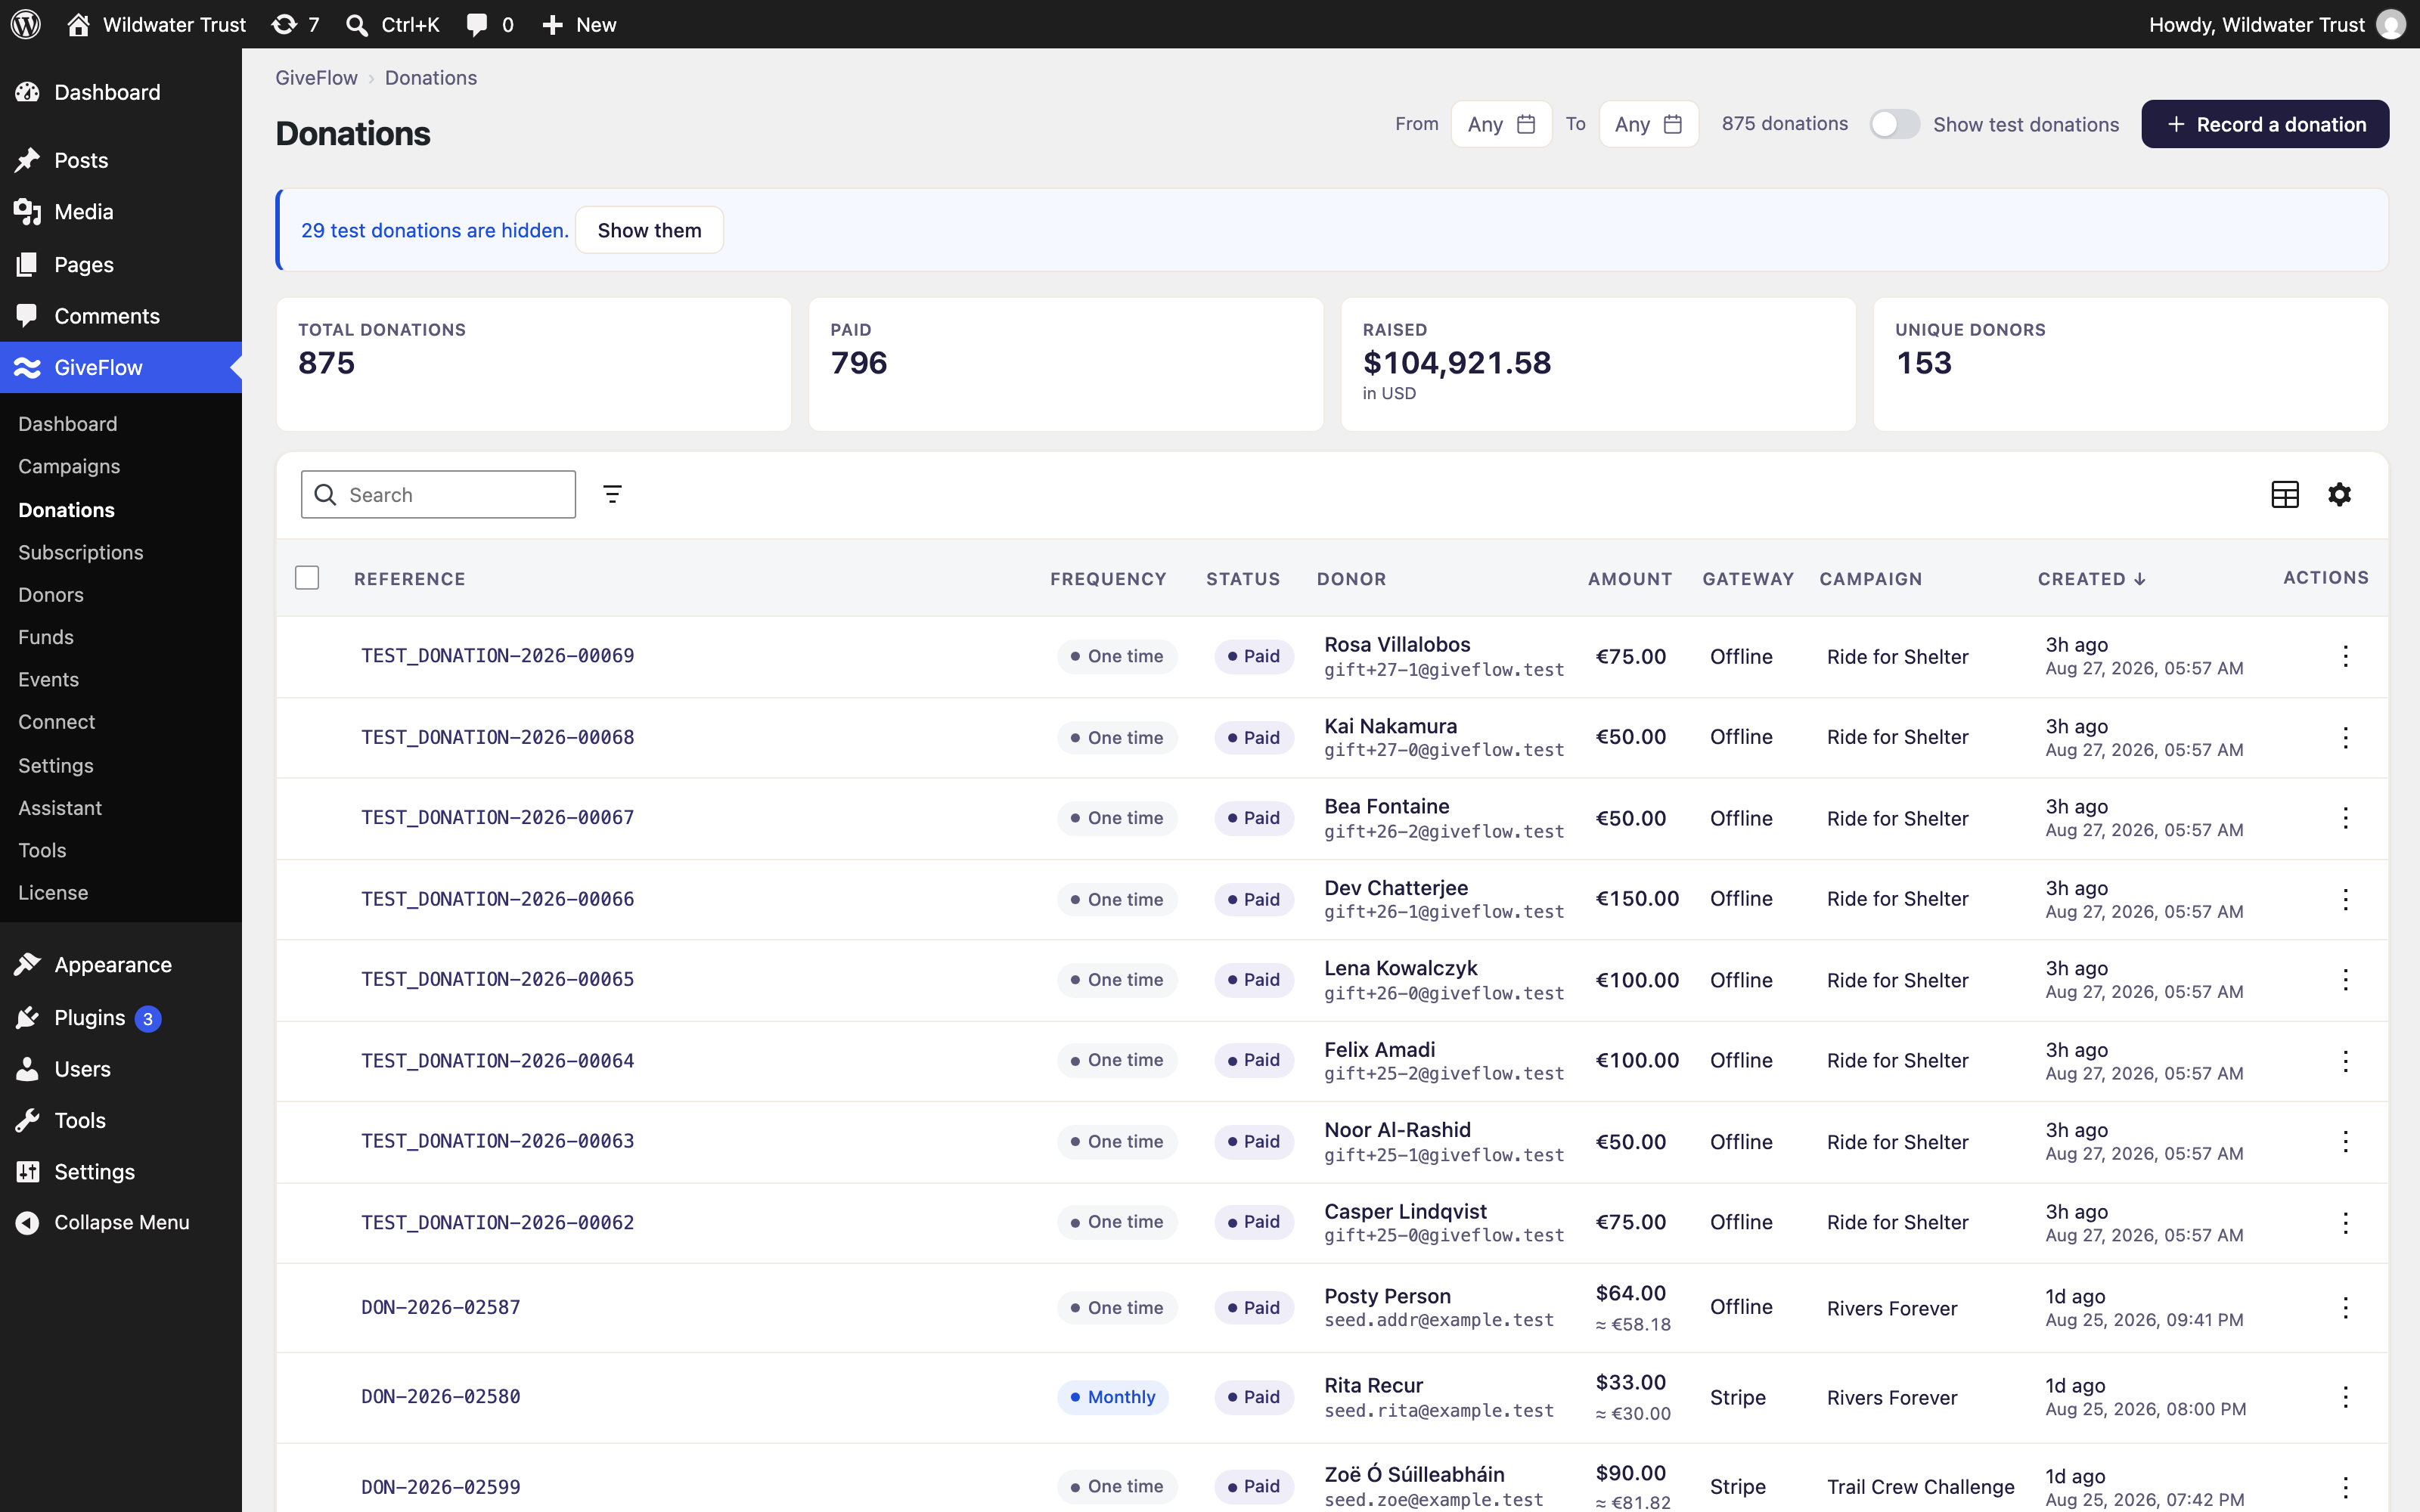
The donations list shows every donation your organization has received. You can access it from the GiveFlow menu in your WordPress admin sidebar.
Columns
The list displays the following columns for each donation:
- Reference number
- Status
- Donor name and email
- Amount (with currency, and the base-currency equivalent when the donation was made in another currency)
- Gateway
- Campaign
- Form
- Created date
Test donations are badged on their reference, so you can tell them apart without adding a column. Test mode is also available as a filter, and as a column from the column picker.
Filtering donations
Use the filter and search controls on the list to narrow results. You can combine any of the following:
- Status — Pending, Processing, Paid, Failed, Refunded, Partially refunded, or Disputed
- Gateway — the payment processor used
- Campaign — the campaign the donation belongs to
- Test mode — test donations only, or live donations only
- Date range — the From and To fields above the list
- Search — matches the reference and the gateway IDs, plus donor name and exact donor email
Test donations are hidden unless you turn on “Show test donations.” When any are hidden, the list tells you how many.
Donation detail
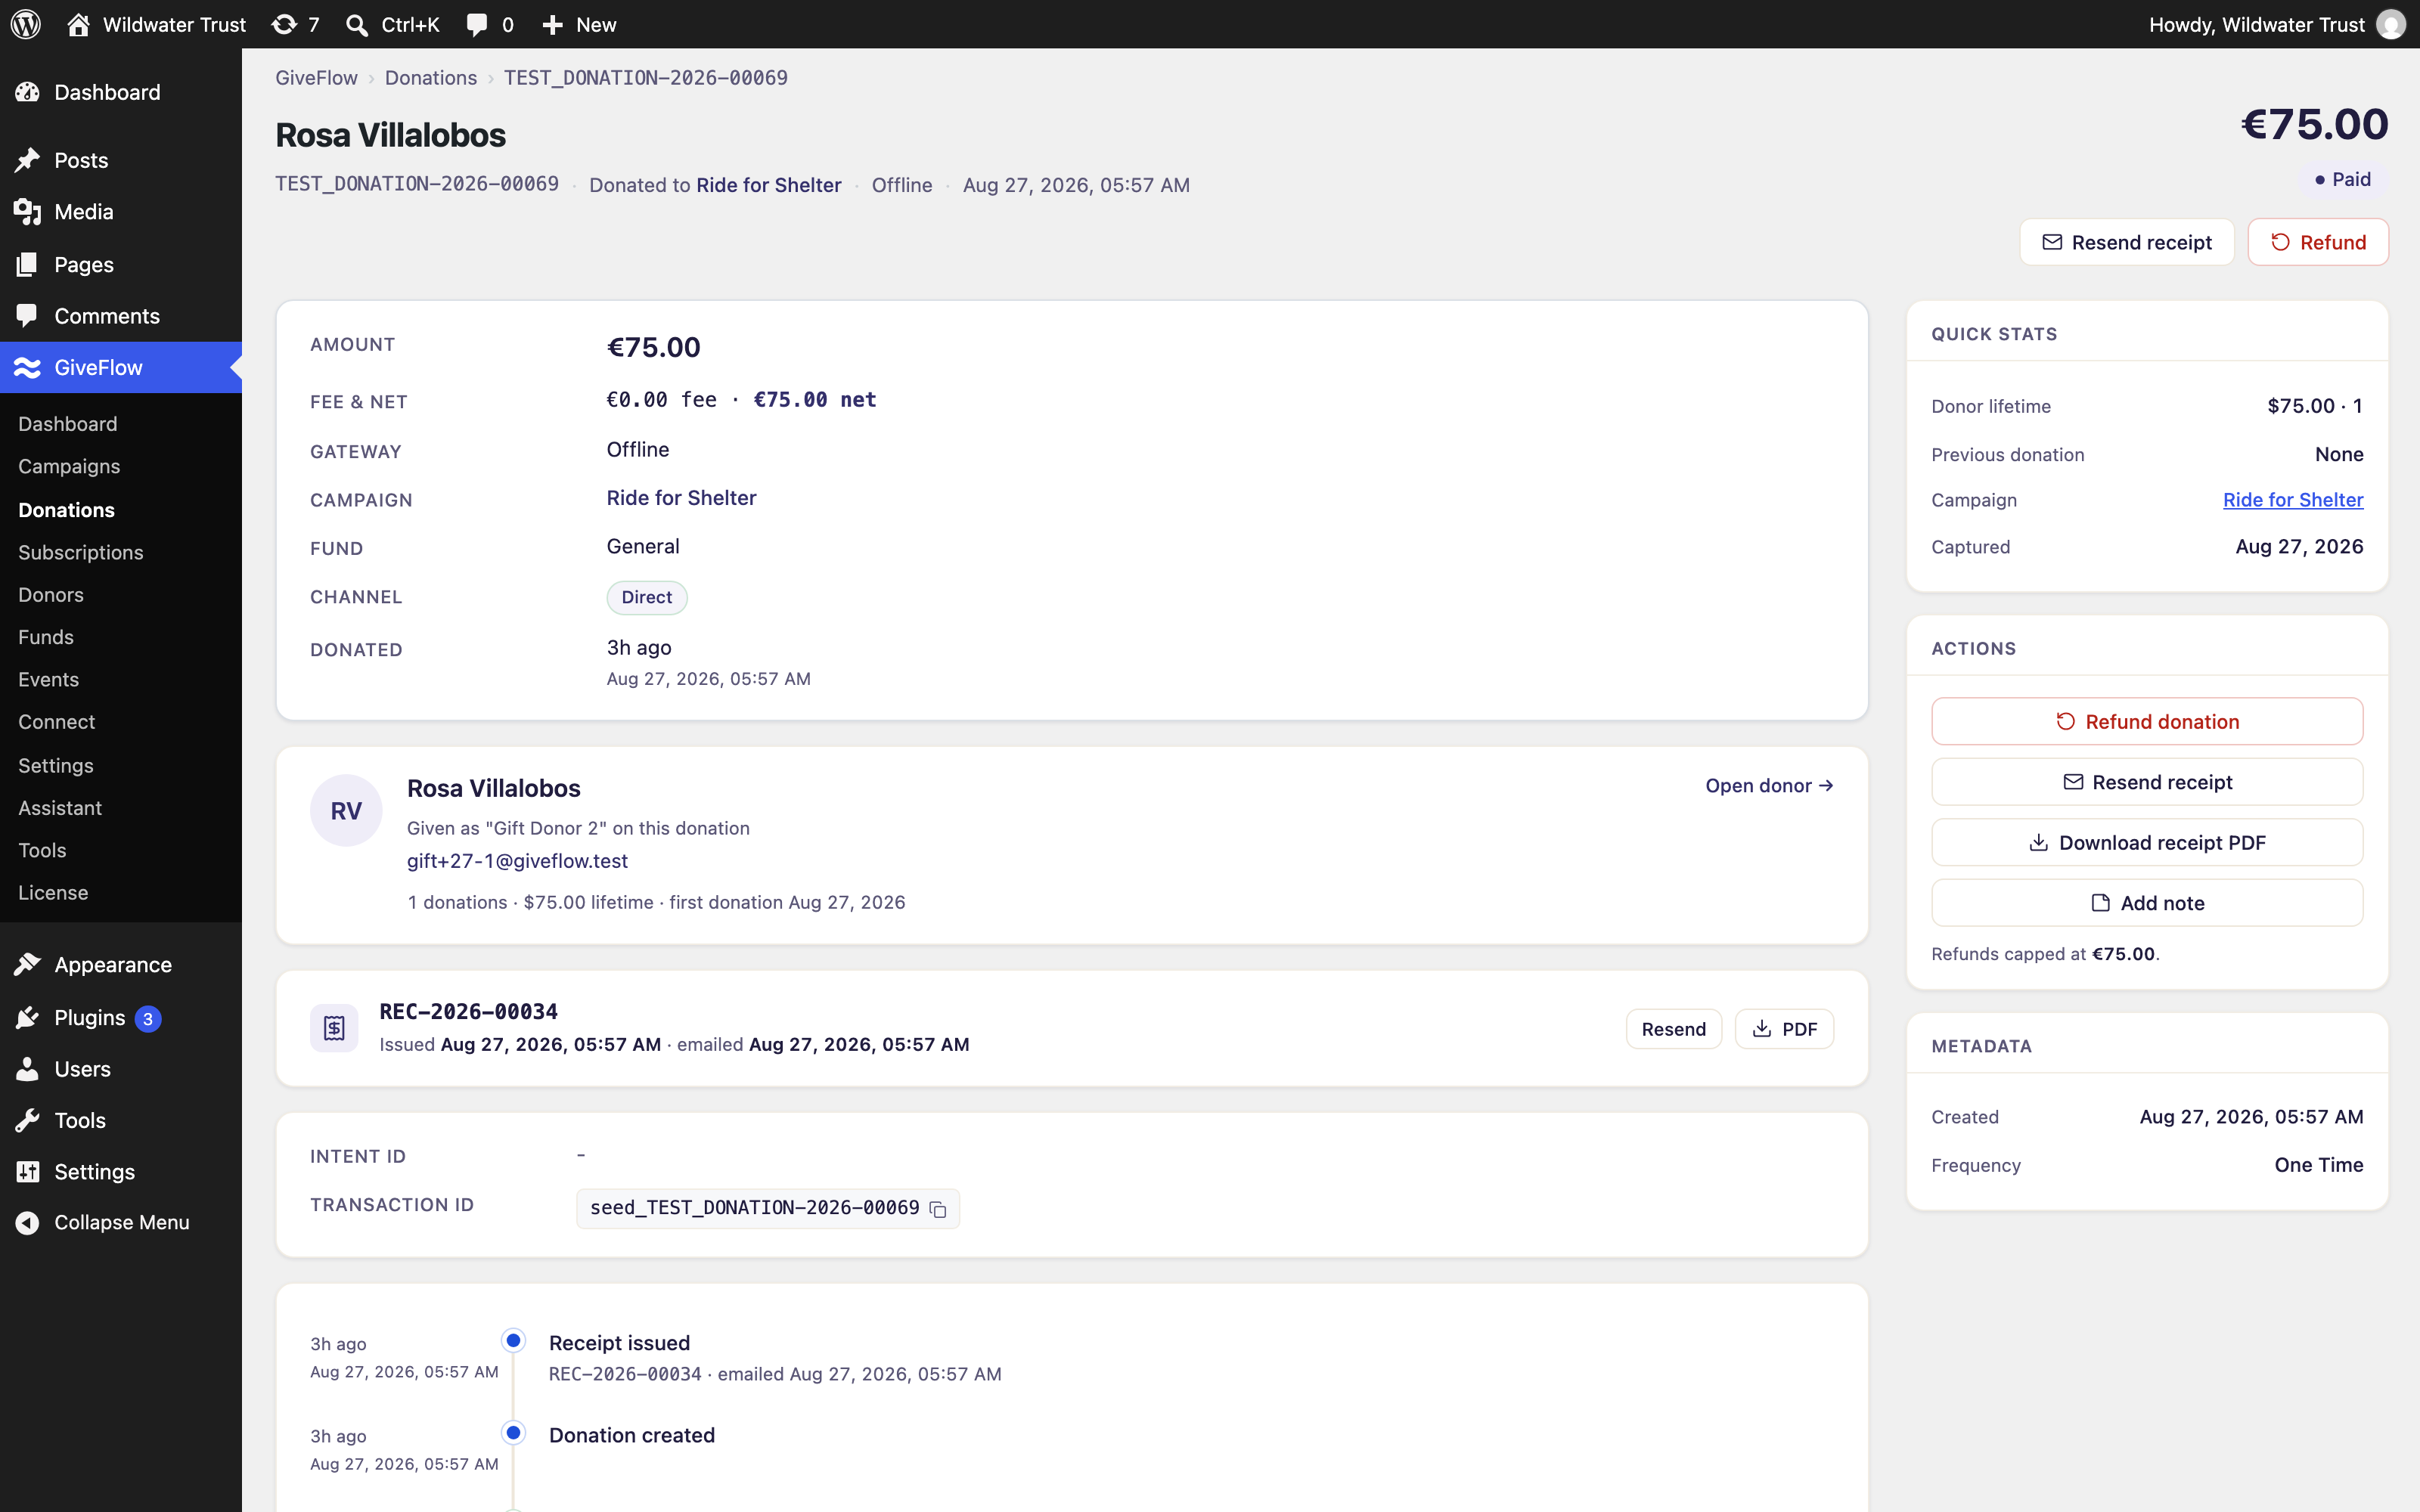
Click any donation in the list to open its detail view. This shows the full record, including:
- Reference number
- Donor name and contact details
- Campaign and form
- Amount, fee, and net
- Frequency, when the donation is part of a recurring plan (weekly, biweekly, monthly, quarterly, or yearly)
- Gateway, intent and transaction IDs, and payment method details
- Channel, worked out from the source attribution the donation was captured with
- Note from the donor to your organization
- Answers to the custom fields on the form
- Whether the donation is anonymous
- Whether the donation is a test transaction
Understanding the reference number format
Every donation receives a unique reference number. By default the format is GIVEFLOW-YYYY-NNNNN, where YYYY is the year and NNNNN is a zero-padded sequential number. For example, GIVEFLOW-2026-00001 is the first donation of 2026. The counter restarts each year.
This reference appears on receipts and in the admin, making it easy to look up specific donations.
Donation statuses
Each donation has one of seven statuses:
- Pending — the donation has been initiated but payment is not yet confirmed
- Processing — the payment is on its way but has not settled yet, which is normal for bank debits
- Paid — payment has been successfully received
- Failed — the payment attempt was unsuccessful
- Refunded — the full donation amount has been returned to the donor
- Partially refunded — part of the donation amount has been returned to the donor
- Disputed — the donor or their bank has opened a dispute on the charge
Marking offline donations as paid
If you receive a donation through an offline method (such as a check or bank transfer), you can mark it as paid manually.
- Open the donation.
- Click “Mark as paid.”
- Confirm the action.
The donation status changes to paid and a receipt is sent to the donor. Pending, processing, and failed donations can all be marked as paid. Pending and processing donations can also be marked as failed, with an optional reason that is recorded on the timeline.
Issuing refunds
You can issue full or partial refunds from the donation, as long as it is paid and has a refundable balance left.
- Open the donation.
- Click “Refund donation.”
- The amount is pre-filled with the full refundable balance. Leave it alone for a full refund, or lower it for a partial one.
- Add a reason if you want one. It is optional.
- Click “Issue refund.”
A full refund sets the status to Refunded. A partial refund sets it to Partially refunded. Either way the refunded total and the remaining refundable balance are shown on the donation, and each refund is listed with its own record.
Resending receipts
You can resend a donation receipt to the donor at any time.
- Open the donation.
- Click “Resend receipt.”
- The receipt is sent to the donor’s email address on file.
This is available on paid donations. A redacted donor has no email address left on file, so the action is disabled for them.
Admin notes
Admin notes let you add internal comments to any donation. These notes are visible only to admin users and are never shown to donors.
- Open the donation.
- Click “Add note,” which takes you to the notes section.
- Type your note and save.
Notes are listed newest first, with the author and timestamp. Note bodies are encrypted at rest.