Multi-step donation forms
Multi-step forms break a long donation form into smaller, focused steps. This reduces visual clutter and guides donors through the process one step at a time.
When to use multi-step forms
Multi-step forms work best when your form has many fields. Consider using them when:
- Your form collects detailed donor information beyond name and email.
- You want to separate the donation amount selection from donor details and payment.
- You want to reduce form abandonment by showing donors a clear, manageable process.
For simple forms with only a few fields, a single-page form is usually better. Multi-step navigation adds complexity, so only use it when the benefit is clear.
Adding the Steps block
The Steps block is the container that holds all your individual steps. You must add it before you can create steps.
- Click the plus button in the header to open the block inserter.
- Find the Steps block under the Content & layout category.
- Click or drag it onto the canvas.
A form can hold one Steps block. It arrives with two steps already inside, named “Your donation” and “Your info”.
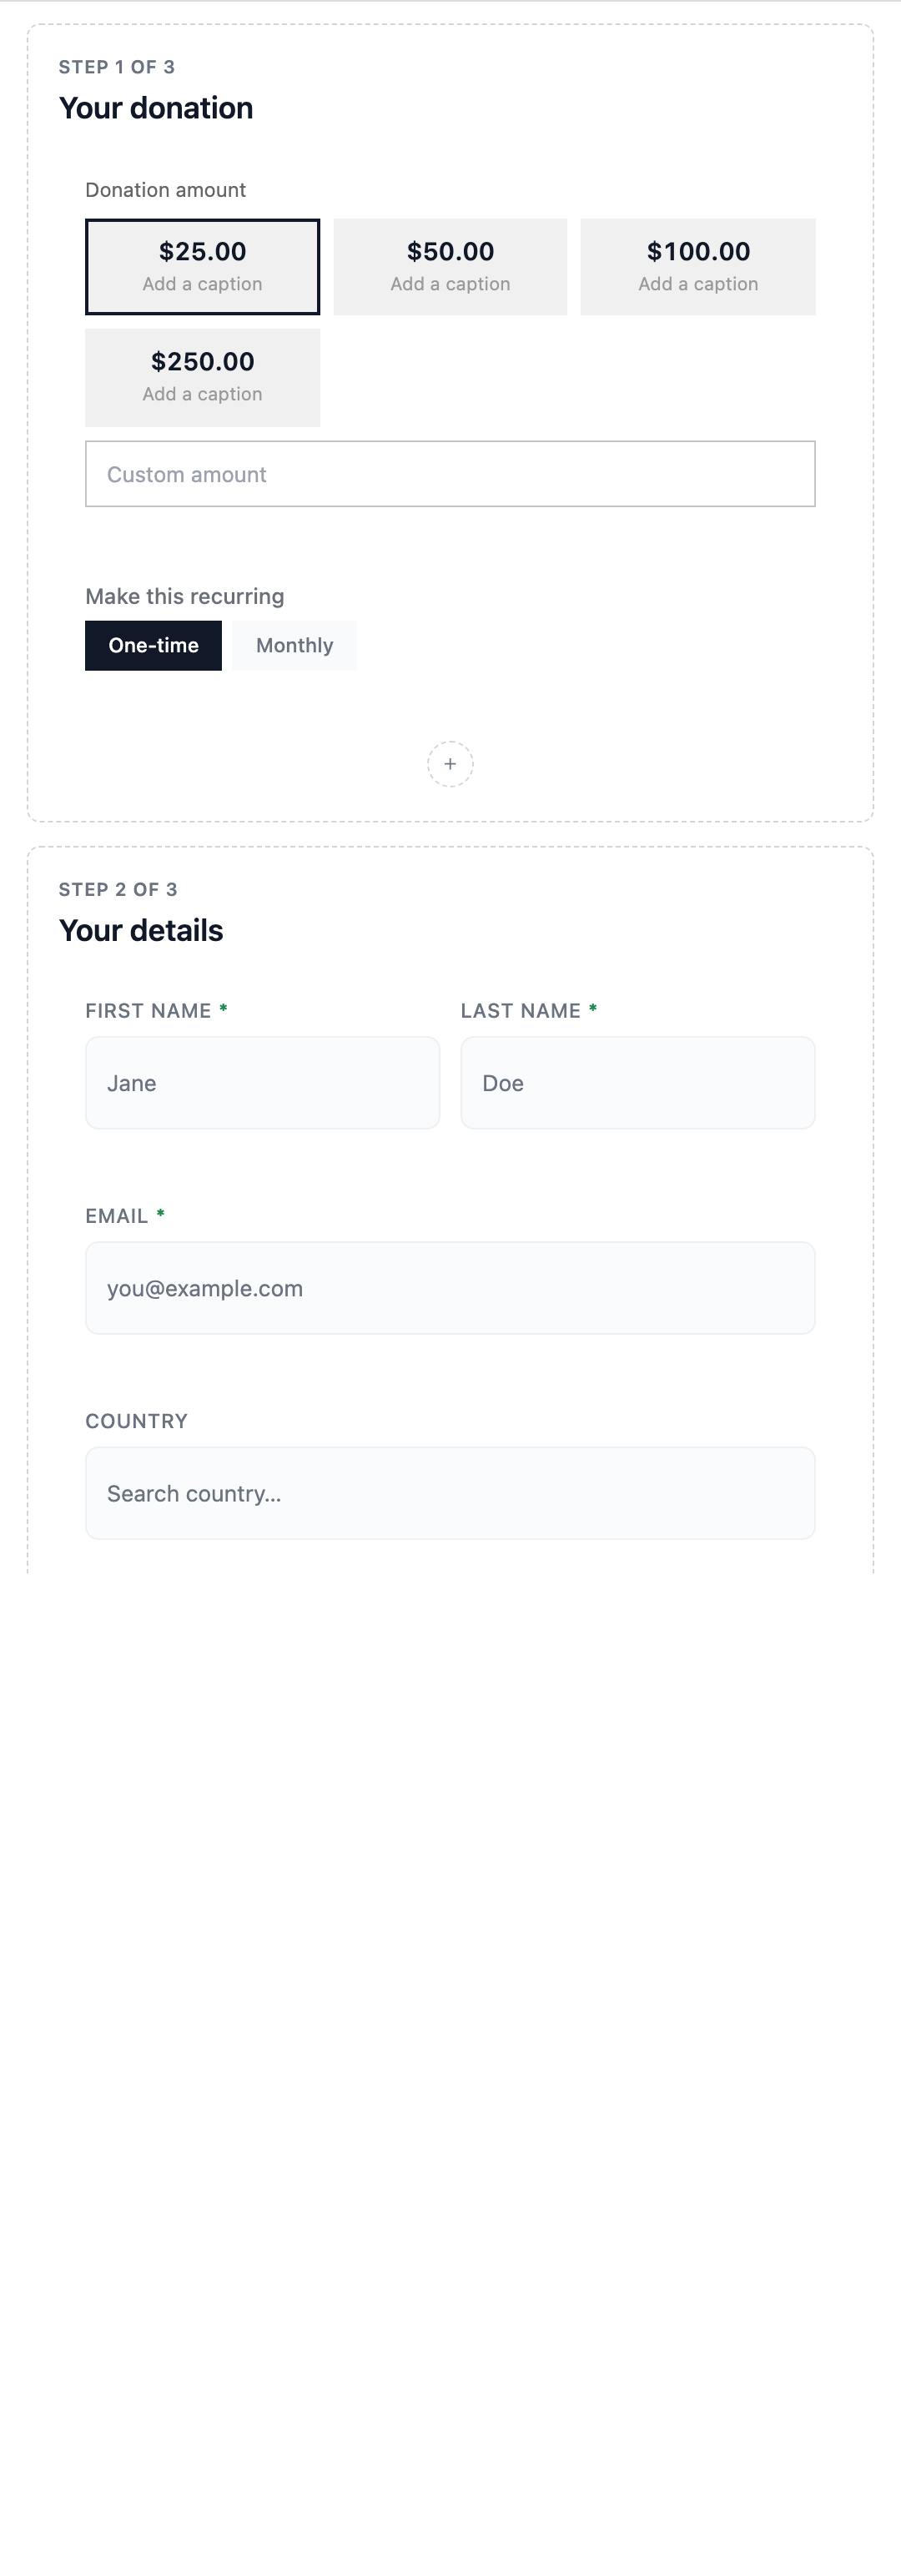
Adding Step blocks
Each Step block represents one page of your multi-step form. You cannot insert a Step from the block inserter; the Steps block creates them for you.
- Click the + Add step button at the bottom of the Steps block. The new step is named “Step 3”, “Step 4”, and so on, and you can rename it.
- Use the appender inside a step to add blocks to it, or drag existing blocks (donation amount, name, email, and so on) into the step.
Repeat for each step you need. You can add as many steps as your form requires.
A step you leave empty shows a warning in the editor, because donors would land on a blank page.
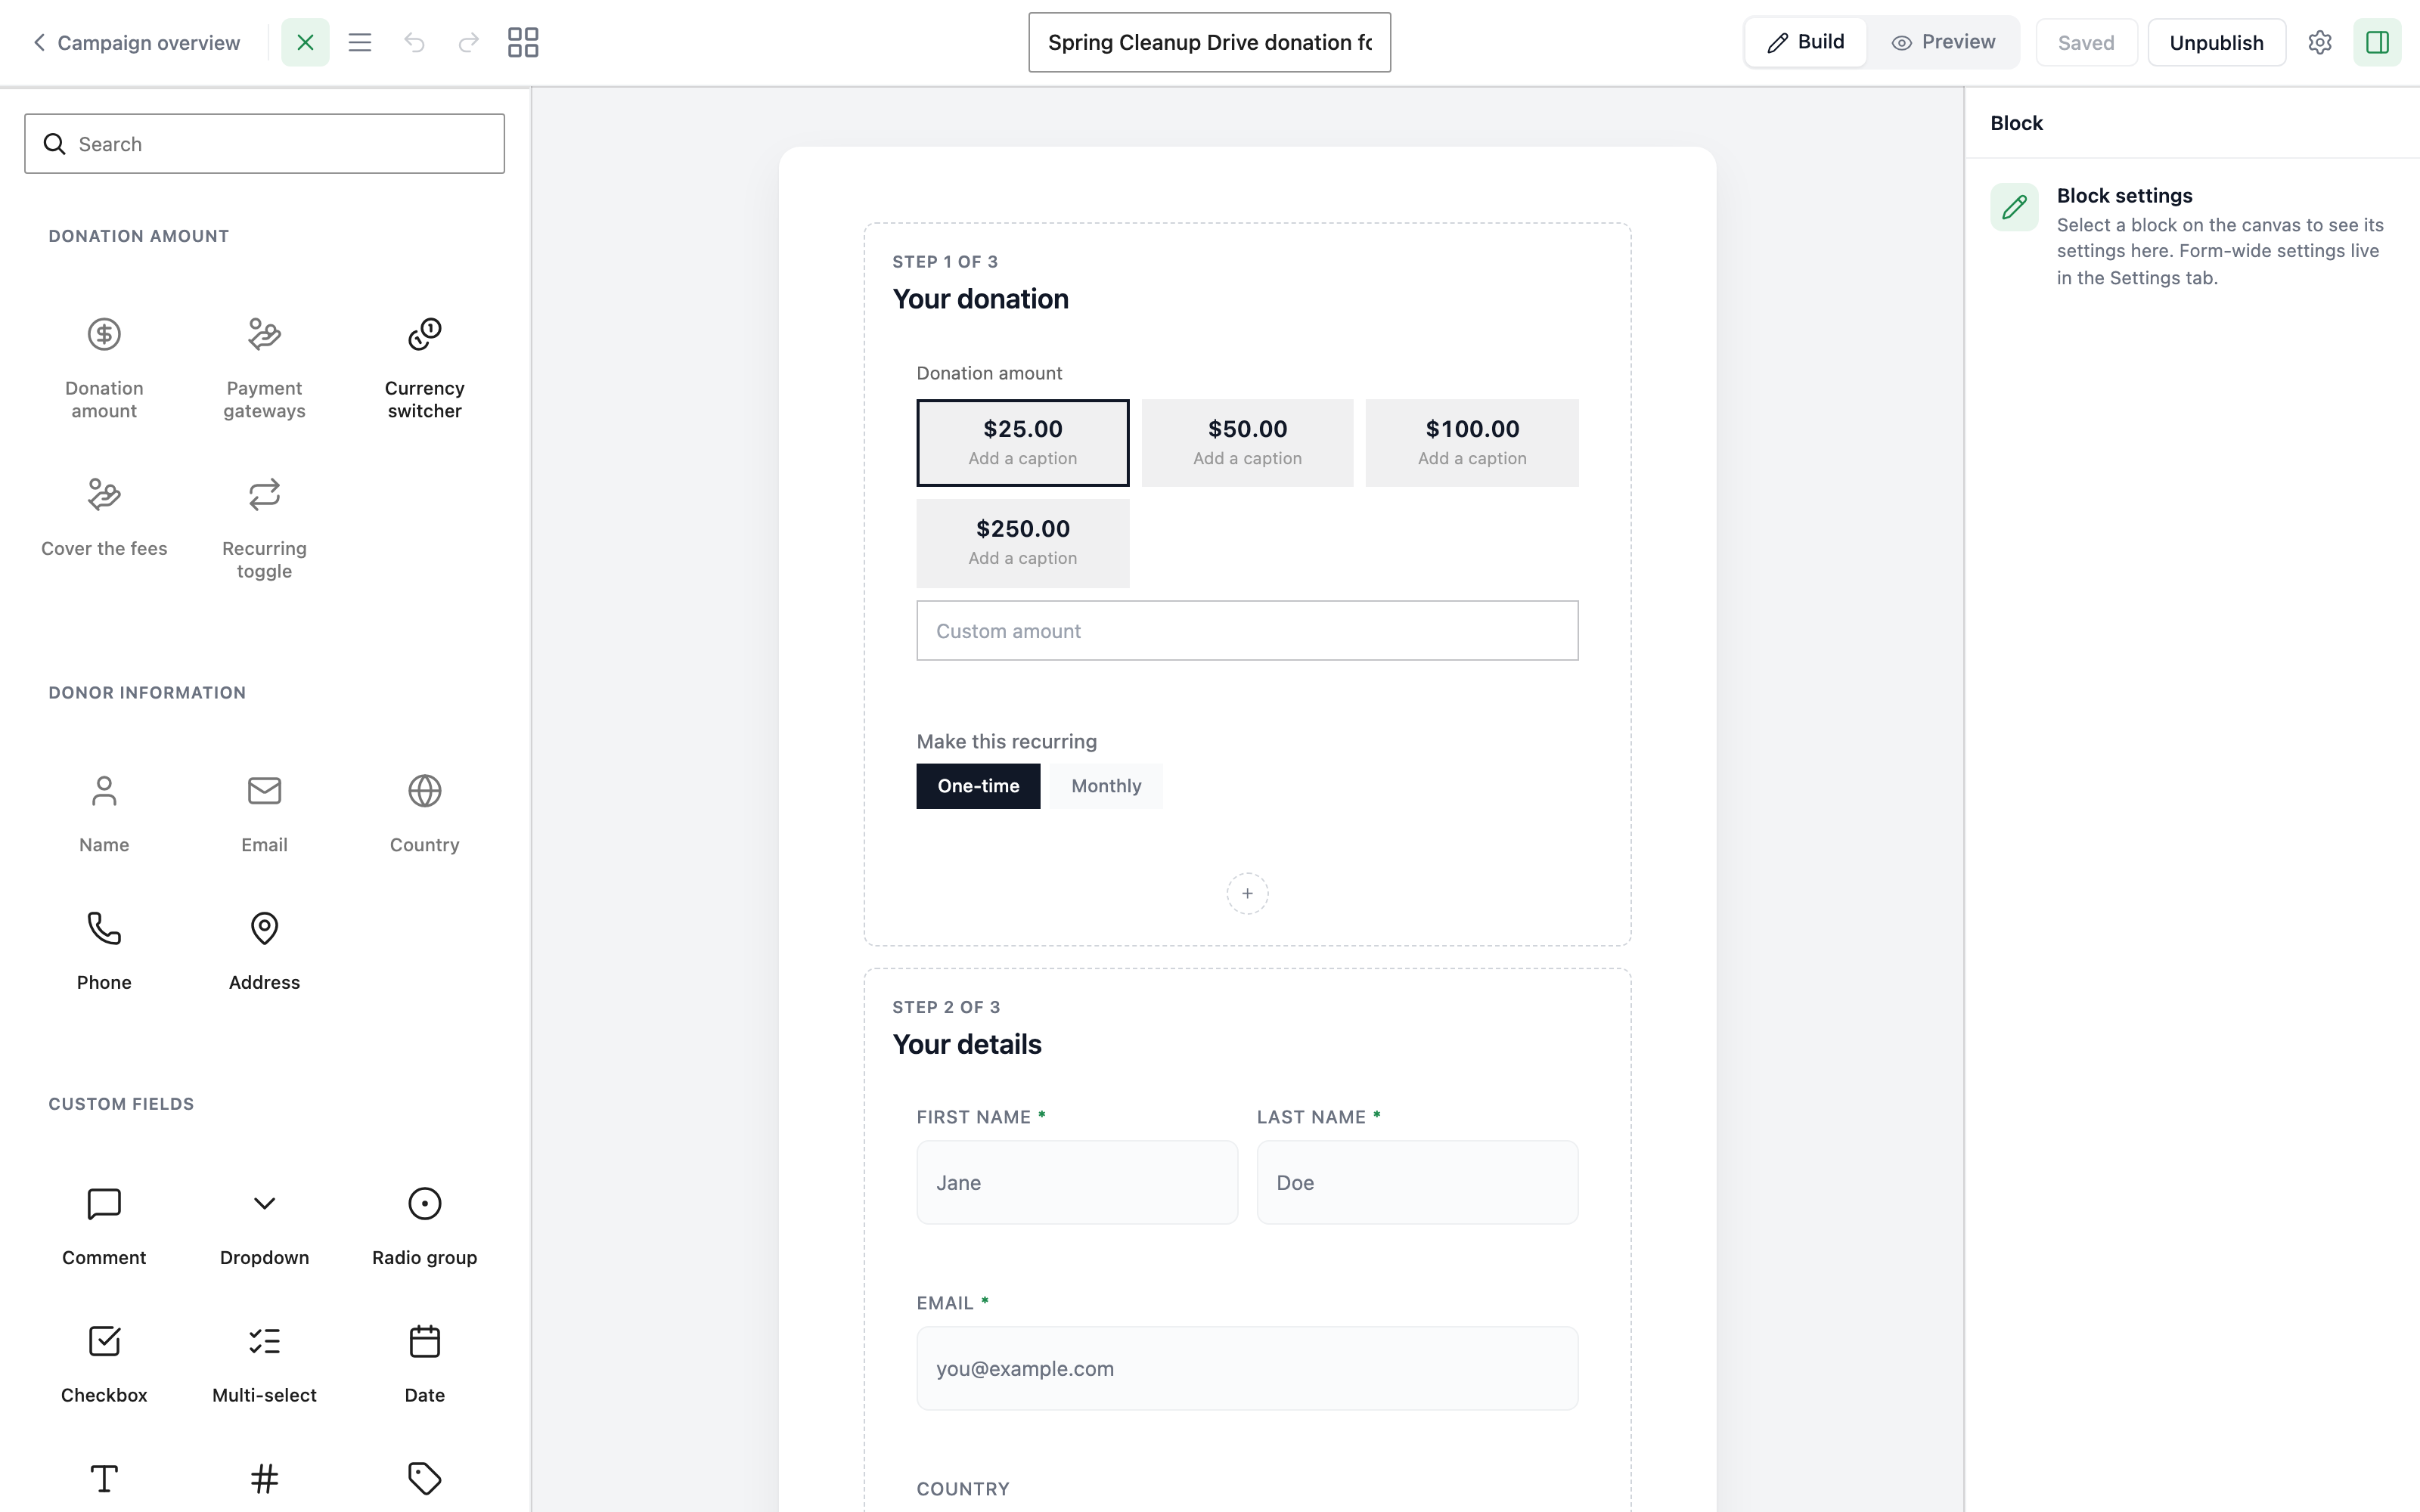
Step settings
Select a step and open the Step panel in the inspector. It has two settings:
| Setting | Description |
|---|---|
| Label | The name of this step, shown as the page title and on the progress indicator |
| Show label | Whether to display the label above the step content. Turning it off still leaves the label as the screen-reader name on the progress indicator |
Give each step a short, descriptive label like “Donation,” “Your details,” or “Payment.”
Progress indicator styles
The Steps block includes a progress indicator that shows donors where they are in the process. You can choose from three styles.
| Style | Description |
|---|---|
| Dots | Centered dots beneath the form, one per step, highlighting the current one |
| Bar | A header bar with a back arrow, the step label, and a progress fill |
| None | Hides the progress indicator entirely |
Configure the progress style under Wizard navigation in the Steps block settings in the inspector panel.
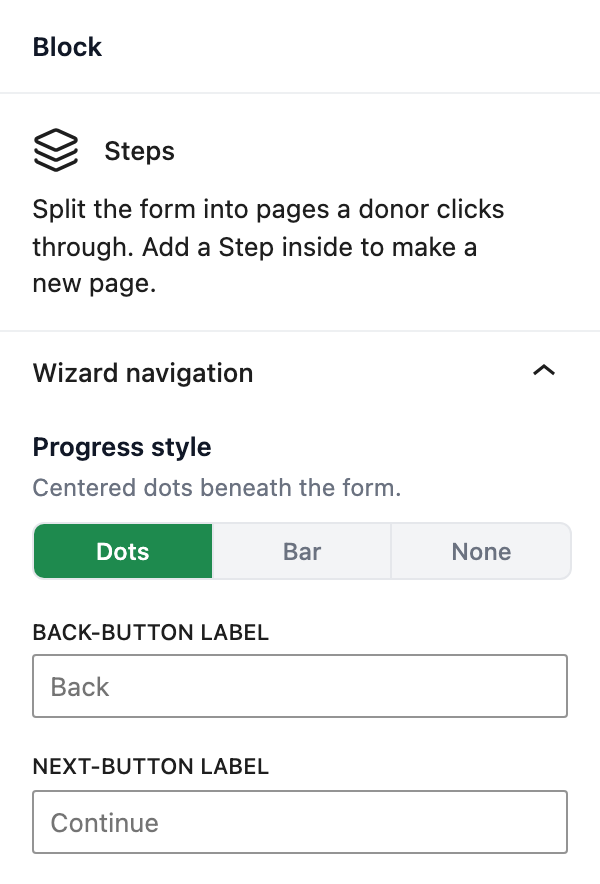
Navigation labels
The Steps block provides back and forward buttons so donors can move between steps. You can customize the text on these buttons.
| Setting | Description |
|---|---|
| Back-button label | Text for the button that goes back to the prior step. Defaults to “Back” |
| Next-button label | Text for the button that advances to the next step. Defaults to “Continue” |
Set these labels under Wizard navigation in the Steps block settings in the inspector panel. Use clear, action-oriented text. With the bar progress style, the back-button label is used as the accessible name on the back arrow rather than as visible text.
Best practices for step organization
Follow these guidelines to create effective multi-step forms.
Keep it to 2-4 steps
Most donation forms work well with 2 to 3 steps. More than 4 steps can feel tedious and increase abandonment. Aim for the fewest steps that still keep each page focused.
Put the donation amount first
Start with the donation amount step. Donors arrive with intent to donate, so let them choose their amount right away. Collecting personal information first can feel like a barrier.
Group related fields together
Place related fields in the same step. For example:
- Step 1: Donation amount, recurring toggle, cover fees
- Step 2: Name, email, phone, address
- Step 3: Payment gateways and the donate button
Include required blocks
Remember that every form must include the three required blocks: Donation amount, Name, and Email. Distribute them across your steps as needed, but make sure all three are present.
Use descriptive step labels
Give each step a label that tells donors what to expect. Labels like “Choose your amount” and “Your information” are more helpful than “Step 1” and “Step 2.”
Place the donate button in the last step
Put the Donate button block in your final step. Donors should complete all previous steps before submitting the form.